1. Full-Screen Is Your Friend
Proofread every page of your project in full-screen mode before ordering. (Click the "Full" button below the main image.)
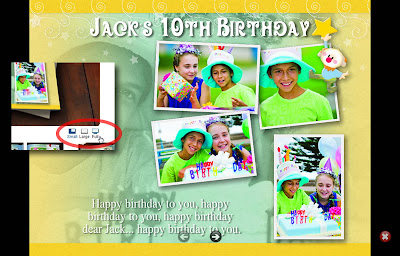
The "Full" button (inset) zooms your layout to the full size of your screen so you can inspect it in detail. (Click to enlarge.)
2. Double-Check Your Text.
If you're unsure about spelling, type your text into a word processor and spell-check it there. Then paste the corrected text into the program.
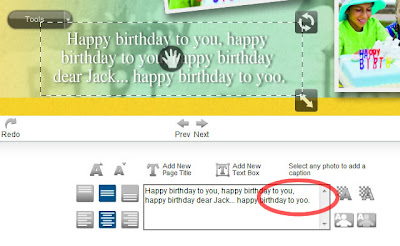
Yoo-hoo! Avoid boo-boos. Use a word processor to polish your text to perfection, then paste it into RocketLife's text-entry area. (Click to enlarge.)
3. Stay Safe
Pay attention to the Photo Safe Area at the edge of the layout. Items that cross into that area may be cut off during printing.
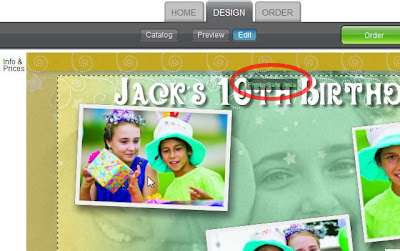
The Photo Safe Area border appears as you drag items toward the edge of the layout. Keep them inside this border so they won't be cropped when your project is printed. (Click to enlarge.)
Tip Sometimes you may want to drag an object all the way to the edge of the layout — or even beyond — to create a dramatic cropping effect. To drag an object to the edge, hold down the Shift key on your keyboard while dragging. Hold down the Control key instead to drag it even farther. Here's an example.
4. Watch for Warnings
Make sure your images are big enough to print clearly. If an image is too small, the program displays a Low Resolution Warning, along with directions for fixing the problem image.
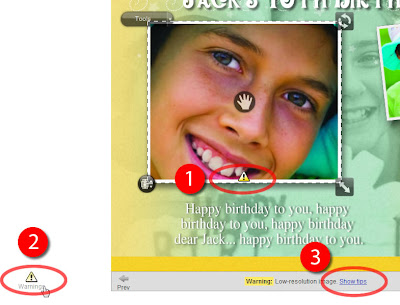
The Low Resolution Warning symbol on an image (1) tells you the image is too small to print clearly. Clicking the symbol at left (2) reveals tips for fixing the image (3). (Click to enlarge.)
5. Lighten Up
Consider brightening dark photos in your layouts. (The Brightness tool is in the Touch-Up tab.) Many computer screens are unnaturally bright, causing photos to print darker than you'd expect.
Tip You can use the Brightness tool creatively, too. Try brightening a background photo to fade it out, or darkening a placeable graphic to turn it into a silhouette.
6. Choose a Book by Its (Thumbnail) Cover
The 3D preview shows you exactly how your finished project will look. Except in one case: It doesn't update to show different book covers as you select them. Instead, refer to the thumbnail images to see what the selected cover style will look like.
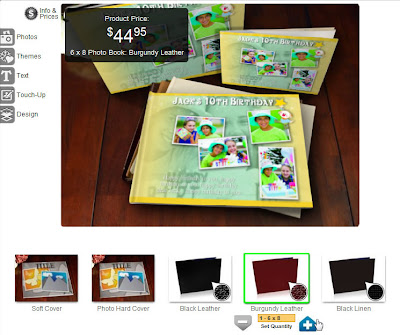
With hundreds of cover styles available, it was simplest to show just the main one in the 3D preview. Use the thumbnail images at bottom to see what the selected cover style will look like. (Click to enlarge.)
Feel free to add your own tips in the comments section below. Remember, our customer support staff is available 9–6 weekdays (Eastern US time) at 866-934-9514 to answer detailed questions and help with specific computer issues. For simpler questions, visit our Facebook page.
